Tuesday 25 November 2014

Some more activity!

Every now and then I get the yen to actually do something on the layout and, sometimes, I actually get to do it!

The first project to get underway laterly was to superdetail and fit a Tsunami chip to one of the Austrains 'roundtop' 36 class I have had lying around idle since I went DCC in the mid-2000s.

The work went well and by 9 November 2014 the detailing work was complete.

 The two photos show above show 'before and after' shots of each side of the loco.

This is a close up of the left hand side of the loco, showing the added Nathan lubricator, plus various pipes and handrails. 


 The right hand side of the loco with the various added 'bits'.


 The right hand side of the tender with fire irons, plus added lamp brackets and handrails and a fall plate between engine and tender.


By 13 November she had been undercoated.


On 14 November a start had been made on weathering.


 The inspiration for the weathering. John Stormont took this photo of 3607 at Cootamundra in 1954 and the photo was originally printed in the January 1990 edition of the RTM's 'Round House' magazine. I am aiming for a scruffy, but reasonably well-kept appearance.


While the weathering is nowhere near complete (plus the loco still has some details to be added, after painting) by 23 November she was 'under trials' on the layout. Unsuccessfully, it turned out, as there appears to be a bind in the mechanism! I'll sort that out before I do any more painting.


Meanwhile, some work has also occurred on the layout. I have finally got around to more work on the backscene behind 'New Yard' and made a start on the foundations of the scenery.

 On 16 November I had painted the section of backscene between the existing Haskell backscene behind 'New Yard' proper and the painted backscene behind the old part of the layout a nice sky blue and started gluing slabs of foam down to form the scenery.


 By the next day the glue had dried and I had carved the foam to the rough shape of the landscape.


 On Saturday 22 November I had attached a modified Haskell backscene between the existing one and the painted section and glued slabs of foam on the yard section of baseboard. The backscenes don't quite match yet, but a little painting at a later date and some judicious tree planting in the foreground will take care of that eventually.


 A shot taken from approximately opposite the station building, showing how the new section will eventually blend in. The road bridge and embankment already makes a good 'view block' between the two scenes (the station and the new yard).


Another shot along the length of 'New Yard' showing a bit more of how it all fits together. I'm looking forward to getting the scenery down as I am heartily sick of running trains on a 'Plywood Central'.

Wednesday 24 September 2014

It's been a while...

Good grief! I've managed two posts in the same year!

No particular theme with this one, just a few random shots of models I have completed over the last year or so.


Lambing Flat now has a very modern diesel, an Auscision 422 class. It has been fitted with a Loksound chip loaded with the sound scheme from DCCSounds. It runs and sounds very well. It has not been weathered yet, but will be as soon as I can get around to it. As it is a *very* 'modern' engine for Lambing Flat it will only get a very light weathering so it represents the prototype in its first weeks of life. In the meantime, it is very nice listening to the lovely GM growl of one of my very favourite NSWGR diesels.

Another project almost completed is this standard NSWGR brick and steel road overbridge.The bridge was built from measurements I took in January 1995 of the road overbridge just south of Jerrawa Viaduct on the NSW Main South line, though the model has been slightly modified to suit the position it will occupy on the layout. The 'steelwork' of the bridge was constructed from Evergreen Styrene shapes. The 'brickwork' was made by glueing brickpaper over thick card. The brickpaper was downloaded from the Paperbrick site:http://paperbrick.co.uk/ A very useful site indeed! I had originally intended to build the model with correct 'English Bond' brickwork and downloaded sample sheets of that bond... however, I also downloaded a sheet of stretcher bond in the same colour... guess which one I printed out when it came time to start construction! I didn't realise I was using the wrong bond till about halfway through construction, so perhaps it isn't that noticeable! Now all I have to do is weather it and instal it on the layout. 

Some may have read my review of  Bragdon Enterprises' weathering powders printed in the August 2014 issue of AMRM. Here are a couple of different photos of some of the models I weathered for the review. Above is a StructOrama ready-to-place HO scale shed modified from standard (bottom building) to look more like a NSWGR building (top building), in order to house the wagon repair staff and equipment at Lambing Flat's 'New Yard'. As befits my period, I resolved to repaint it in NSWGR 'stone' colours. First I carefully painted the window frames Tamiya XF-2 Flat White, then did the walls in Tamiya XF-20 Medium Grey. Once that had dried I painted the roof with Tamiya XF-16 Flat Aluminum the window trim, doors, barge boards on the gable ends of the building and the downpipes Humbrol No.62 Leather, which is the closest colour to NSWGR Medium Stone that I have found. Then the inside of the gutters was painted dirty black and the gutters themselves Tamiya XF-10 Flat Brown to represent the NSWGR Dark Stone colour. The edge of the base was painted Tamiya XF-55 Deck Tan to represent the concrete slab the building rests on.
The photo above shows it before weathering, as a comparison with the standard article. Below is the building after weathering with the Bradgon powders..


Below is my Eureka 620/720 class two-car diesel train (not a bloody railmotor, you ignorant Sassenachs! ;), weathered with a little acrylic paint and some Bragdon Enterprises weathering powders. The silver wheel faces were painted brown with a Floquil paint pen and the grills undercoated with Tamiya Matt Black, then the entire train was weathered with the powders. I'm aiming for a fairly clean look (the 620s were fairly new in my timeframe, as well as reasonably well looked after), so I was after a 'dusty' look, but not 'disgusting'! I'm still not completely satisfied though, particularly with the roof and grills (there was no black in the sample pack), but it is definitely a huge improvement over the unweathered version.


I also reweathered my Trainorama 4429, as the acrylic paint weathering applied back in 2005 had started to fade, particularly on the bogies, so I brushed on a quick coat of Grimy Grey Bradgon powder and this is the result. I'm very pleased and quite intrigued at how quickly and easily one gets realistic results with the weathering powders. 


Here is another 'before and after' comparison showing two Austrains 48' goods brakevans. The LHG at the bottom is straight out of the box, except that I have painted the wheel rims brown. The OHG at the top has had the coupler release levers removed (the prototypes were screw coupled), had the wheel rims painted brown, a little dilute acrylic brown 'washed' over the underframe and a little brown/black 'washed' over the roof to tone it down a bit, while the rest was done with the Bradgon weathering powders.


I'm still weathering the 'old fashioned' way with acrylic paint. Here are a couple I have completed over the last couple of years. Here is an 'as delivered' Trainorama MHG weathered to represent a fairly recently outshopped vehicle, as not everything was decrepit and ready for the knacker's yard! A light dusting of Tamiya XF-52 Flat Earth and some Aqueous Hobby Color H343 Soot, with some Tamiya XF-10 Flat Brown for the rust has bought up the detail, but kept the vehicle looking relatively clean and new.


This other Traino MHG has been more heavily weathered to represent a vehicle that has been 'out on the road' for a much longer period, to the extent that it has suffered a broken window at some stage and had the window frame replaced with an Indian red one from carriage stores, something that was quite common in the 1960s. 


I've also been madly weathering what seems like boxes and boxes of Austrains four-wheel vans, using my standard diluted acrylic paint methods. Here are just a few examples.


I haven't just been 'plonking', I have also completed a pair of IDR NSWGR B wagon kits. As usual, they aren't *quite* as the manufacturer intended... I have added uncoupling levers and substituted some much closer to scale door bangs than were provided in the kit. A very nice model and dead easy (and quick) to put together. This one has been weathered and I've also added a little 'left over' coal to the interior for when it is running empty.


Infrastructure hasn't been neglected either. This is a close up of the signal box at Back Creek Jct seen in an earlier post. The box was constructed from a Stephen Johnson urethane kit I have had salted away for about 20 years, with the platform scratchbuilt from timber. The box nameboard was assembled in Photoshop and then printed out.

The junction signal for Back Creek Junction was kit-bashed from a combination of old Ratio GWR posts and balance weights, modified Casula etched brass signal arms, home cast whitemetal finials (from self constructed masters, no pirating here! ), Uneek etched brass ladder and the rest scratchbuilt. It is based on drawing of a standard Byles era bracket signal.

Every now and then a small detail item gets added to the layout. After twenty years or so of unfettered access to the railway reservation where the private siding to the Co-op cool stores leaves the main line, a gate has been provided. I scratchbuilt the standard NSWGR pipe gate in brass wire about 10 years ago, undercoated it about two years ago and finally painted and weathered a couple of weeks ago! The standard colour scheme for gates at private level crossings and private sidings was a red colour, but I have never seen one in 'pristine' condition, the ones I saw were always dull, dirty and rusty, so the model was finished accordingly. It is hinged and is openable.


There seems to be a bit of a theme developing here... of projects that take decades to complete! I recently rediscovered an old Vacey Ash (Biltezi) card kit for a British 4mm scale church that I purchased back in the late 1970s. The price tag on it was $1.00! I originally purchased it because it resembled the sort of Gothic revival churches erected in Australia in the 19th century. It was built pretty much as the designer intended, as I will use it as a 'background' building, however, the flat, printed 'slate' roof was extremely unconvincing, so I covered it with some corrugated card and then scratchbuilt bargeboards and gutters. The slightly 'wonky' bell tower is down to a certain giant cat... 


And another 'long distance' project, I photographed and measured the prototype of this flammable materials store at Young on 25 August 1983, over 30 years ago! The unknown dimensions of the building were worked out by 'straightening up' the 1983 photos of the building in Photoshop, adjusting the size until the known dimensions matched HO scale, then printing it out as a plan. Waiting 30 years to build it has made it a lot easier to build! Construction is card, with a box constructed from thick card with corrugated card glued on top and details scratchbuilt from timber and styrene. The sign is a Photoshopped and printed image of the original. 

Wednesday 22 January 2014

Activity at Lambing Flat!

After an entire year of very little activity at Lambing Flat, a resumption of work on the extension has motivated me to bring things up to date.

When my last post was made (in November 2012!) I had just started work on a major extension at the 'down' end of the yard, where the old Murringo fiddleyard used to be (see drawing in previous post). Even with the addition of the second fiddleyard (shown as 'Cowra' on the drawing in the previous post, but since swapped over to be regarded as the 'Demondrille' fiddleyard, because it made more sense geographically), I was still very short of strorage space, plus I was finding that most of the activity was taking place in the fiddleyard as I made up new trains and that most of the rolling stock was usually in the fiddleyards and could not be seen!

I decided that it was time to build a new section and extend the layout a little further. As my favourite activity is shunting trains, I decided that, rather than make a new fiddleyard and have everything still happening 'off stage' and with most of the models hidden away, I would make this new section a marshalling yard, allowing me to shunt 'on stage' and allow more displaying of my rolling stock.

The rationale is that during WW2, traffic grew beyond the capacity of Lambing Flat itself to reverse trains running between Demondrille and Cowra on the cross-country line (as happened in real life at Binnaway, hence the addition of extra marshalling sidings at that location in the 1940s), so new marshalling sidings were laid out just out of town. Also, rather than that end of the line proceeding to the terminus at Murringo, as was the previous scenario, the assumed 'real life' orientation of the station has been turned around and the line now proceeds to Temora (replacing the Cootamundra - Temora line, which wasn't built in my scenario). That explains why the fiddleyard names have swapped, as well.

Now, instead of reversing in Lambing Flat yard, trains on the cross-country line proceed through the station to the New Yard, where they terminate. The yard shunter releases the train locomotive, which then runs light to LF to turn and await its next duty. The yard shunter then shunts the train out, removing any traffic for destinations towards Temora and adding any outbound traffic up to the length limit, then places the loading on a convenient brakevan to make up a new train. When this is done, the train engine returns tender first from LF and attaches to the new train, does the brakes and departs when a 'path' opens up in the heavy traffic on the line (there is usually another train waiting in LF's yard for entrance to the New Yard). Any traffic for the Temora direction is placed in a convenient siding and after a while is assumed to be arriving traffic that is then carded for LF, Cowra or Demondrille and placed on an appropriate train.

Below is a photo log of the construction that occurred in November - December 2012. 


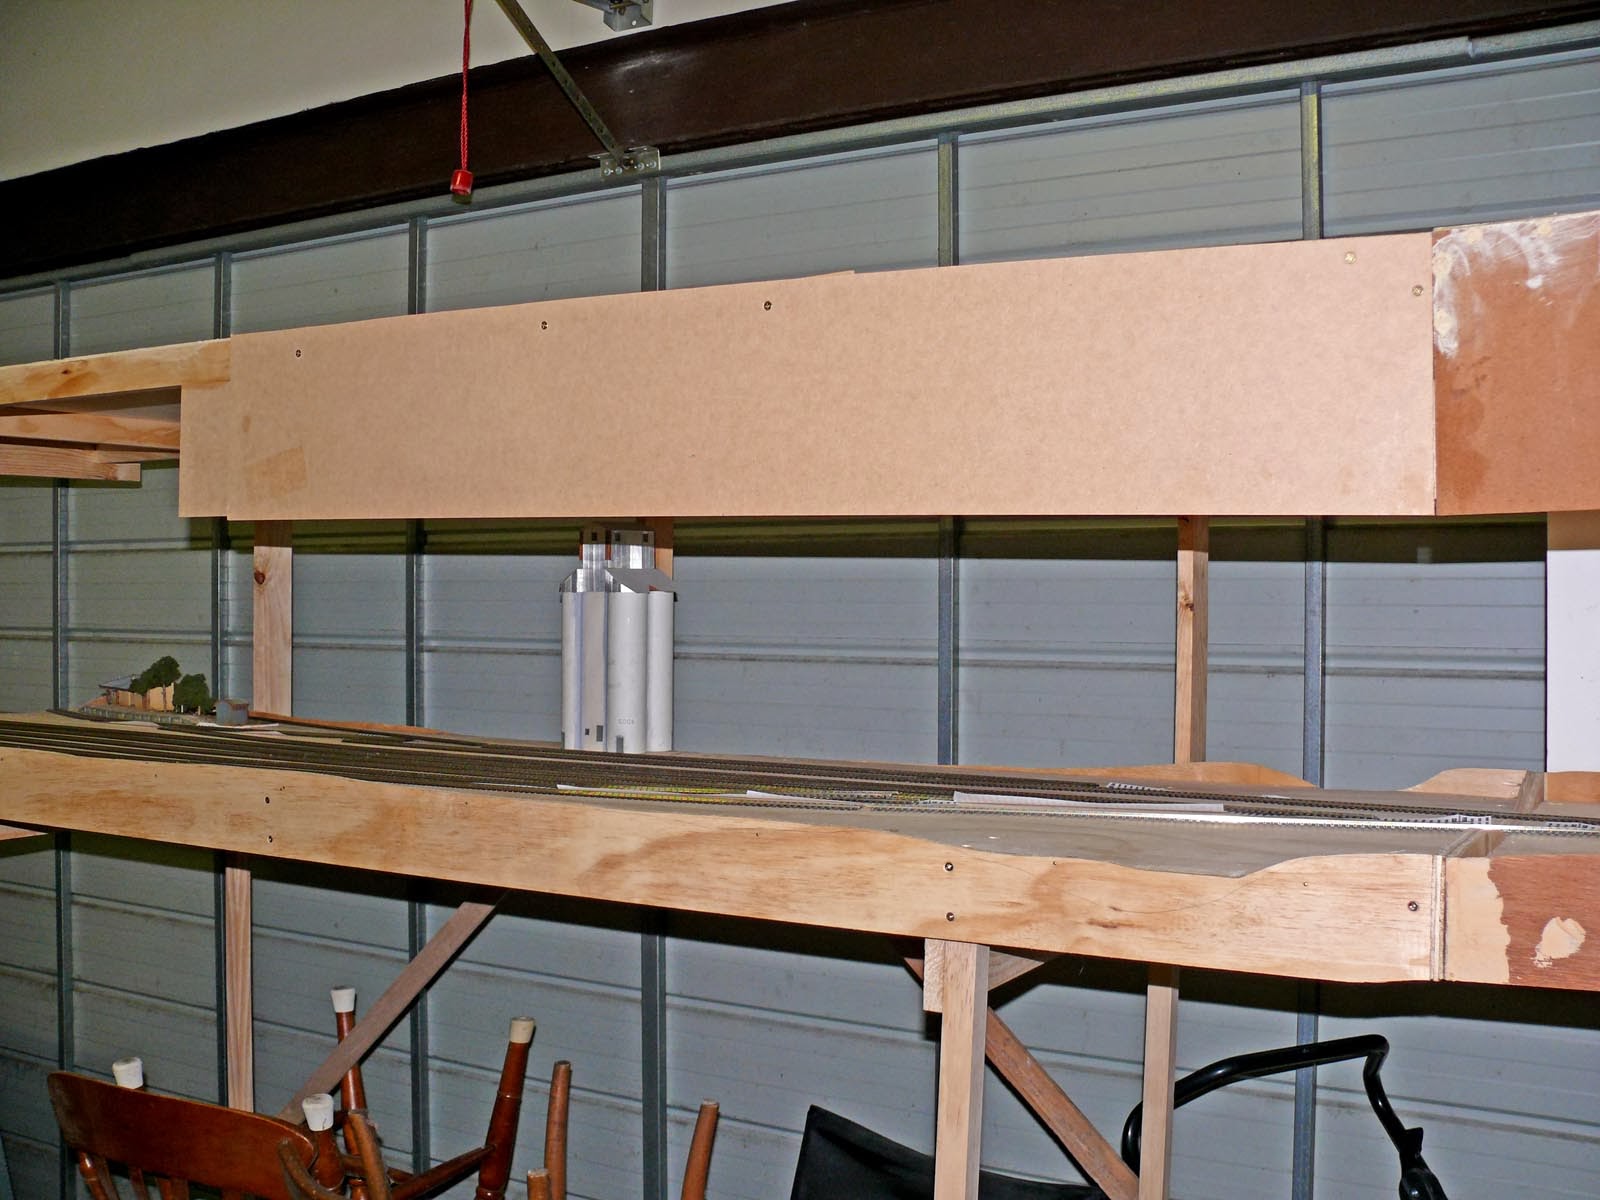
The extension at what is now the western end of the Lambing Flat's yard begins on 6 November 2012. The old 'Murringo' fiddle yard is no more and the support structure for the new corner module is almost complete (the 2" x 1" at far left is temporary while everything dries). The storage shelf that covers the entire layout has been extended, as has the Masonite valance that keeps everything looking tidy! The heavy card backscene has also been extended.


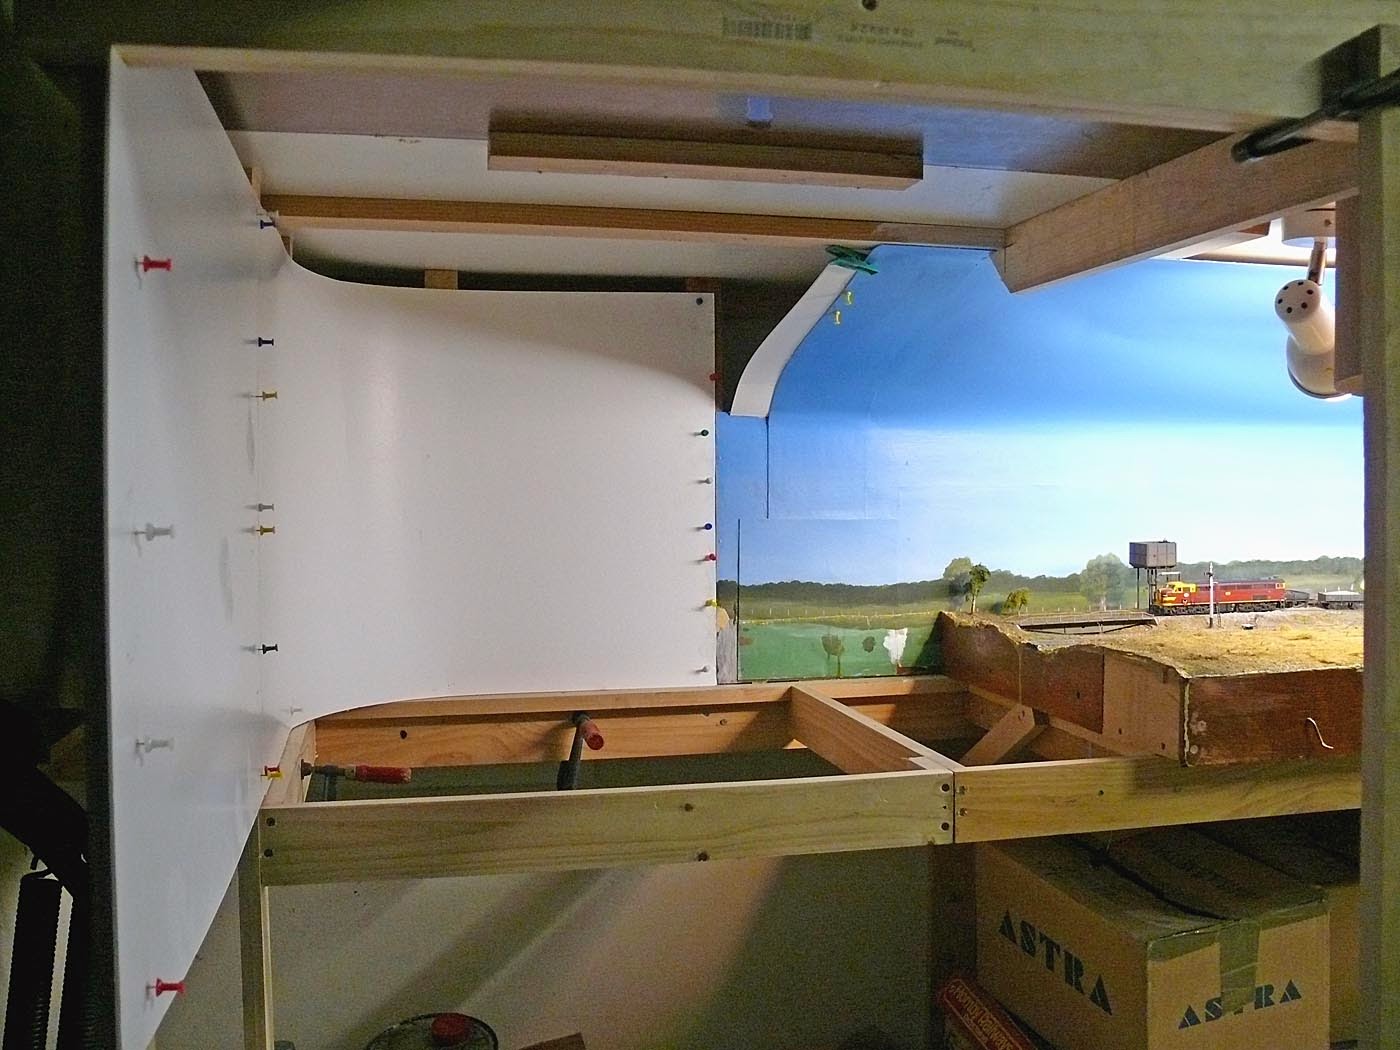
Another view, taken on 6 November, showing where the corner module will go. Where I am standing will be the 'New Yard'. The backscene boards are temporarily pinned while the glue dries. I still have to 'fair' the curved section of the old backscene into the new one before I can paint it. The new backscenes is vertical, as I do not regard the curved over backscenes behind the station to have been a complete success visually and they are a total nuisance when photographing.


Progress by 7 November. The backscene has been roughed in and the basic module completed. I still have to fill and smooth off the backscene before painting it and the module has to have the profile board cut to size and the track supports cut and raised to accomodate the various levels once I have finalised the trackplan. I originally intended to remove the current fabricated steel 60ft turntable and replace it with a 60ft Sellers cast iron table, situated in the left foreground, with a Uneek roundhouse behind and the current turntable access road extended to the turntable with extra roads to accommodate what was to have been a much larger loco depot. However, a change in thinking has postponed that modification till after I have finished the rest of the New Yard. The module is a straightforward ply box, just like all the other modules that make up LF.


By the 10 November the bottom half of the module for the New Yard had been constructed, once more a simple ply box. This one has its own folding legs, with castors attached for easy wheeling around the workspace.


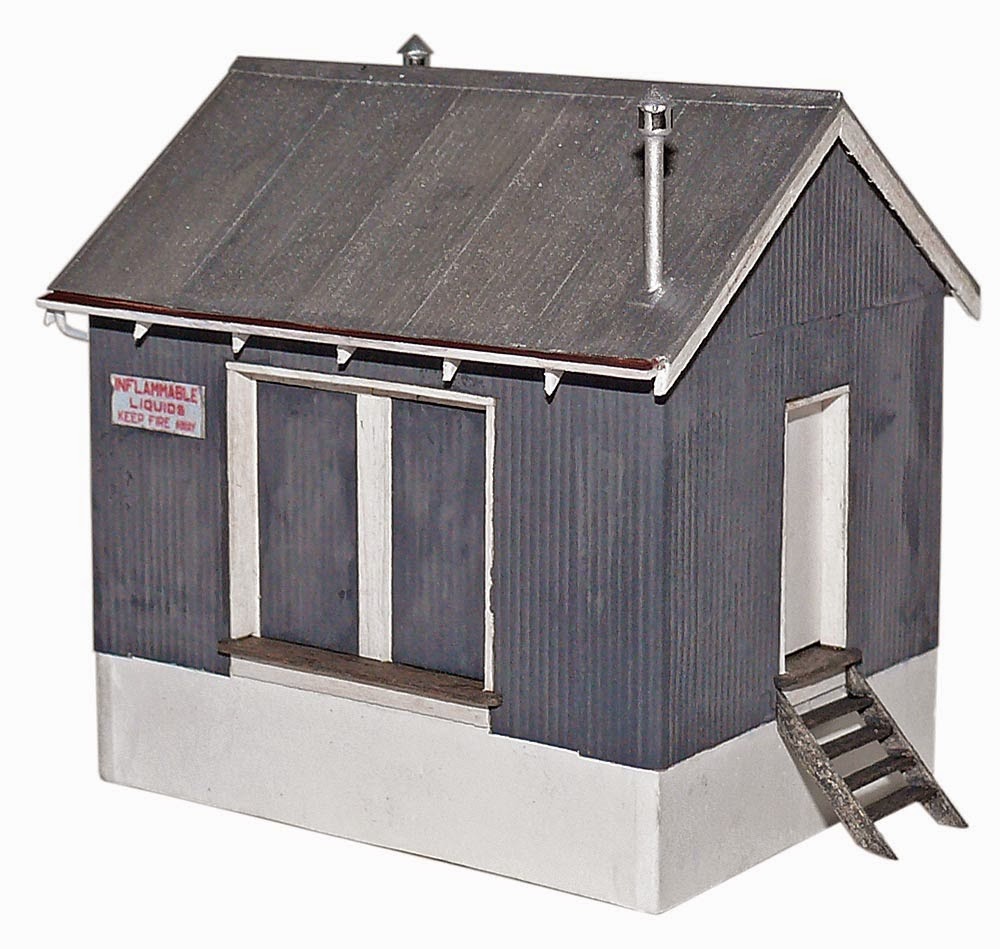
By the 12 November the cover had been mostly completed, a light pine frame with thin ply roof and MDF valances, with just one section of the front valance and the 'slide in' backscene to go in, plus lighting, before tracklaying can begin in earnest. A couple of buildings have already appeared to help with planning.


Another shot from 12 November, with track planning underway, using lengths of flexible track and printed out Peco code 75 turnout diagrams. The track is all Peco code 75, handlaying track is for much younger and more patient people now, as far as I am concerned! The track plan is all based on good NSWGR practice.


Progress by 18 November. The valances have been completed, filled and sanded ready for painting. The backscenes have been installed and preparation for painting is advanced. The lighting has also been installed. The corner module has been lit by adding another fluoro, like the rest of LF (top photo), but I decided to experiment with these new-fangled LED strips for the 'New Yard' module (bottom picture). I'm quite impressed with the results, extremely quick and easy to install and a very good level of lighting. There is only one row in this photo (I later added a second) as the light level seemed a little lower than I like. I now had all the track I needed and once I took delivery of a couple of Cobalt point motors, track laying commenced.


By 3 December 2012 the connecting track between the existing main line at LF and the New Yard entrance turnouts had been laid and 'tested'. The very first loco to run under its own power on the extension, 5303, stands at the entrance to the New Yard.


By 9 December 2012, the trackplan had been finalised and the track laid out, ready to secure once I had installed some more point motors. (The main line is permanently fixed with point motors installed, but the rest of the yard isn't yet.) In the scenario, the New Yard has been laid out adjacent to Wirrimah, the first intermediate goods siding out of LF. The original siding is to the left, while the New Yard is to the right.


By 13 December 2012, all the track had been laid and all but two point motors installed (I ran out and took a while to get some more, then, with one thing and another, they didn't get installed till last week!) I used Cobalt electric 'stall' motors on the main line where crossovers and turnout/catchpoints had to move in unison, with Blue Point manual turnout 'motors' in the yard where turnouts move individually. The next step was to wire it all up and get it working. The track on the right is the main line, with Wirrimah's goods siding in the distance. The crossover allows entry into the yard and the 'nest' of sidings at the top left. The track parallel to the main line on the left bottom is the shunting neck, which reaches back towards Lambing Flat, but isn't connected to it. The loop siding on the left is the Repair Road.

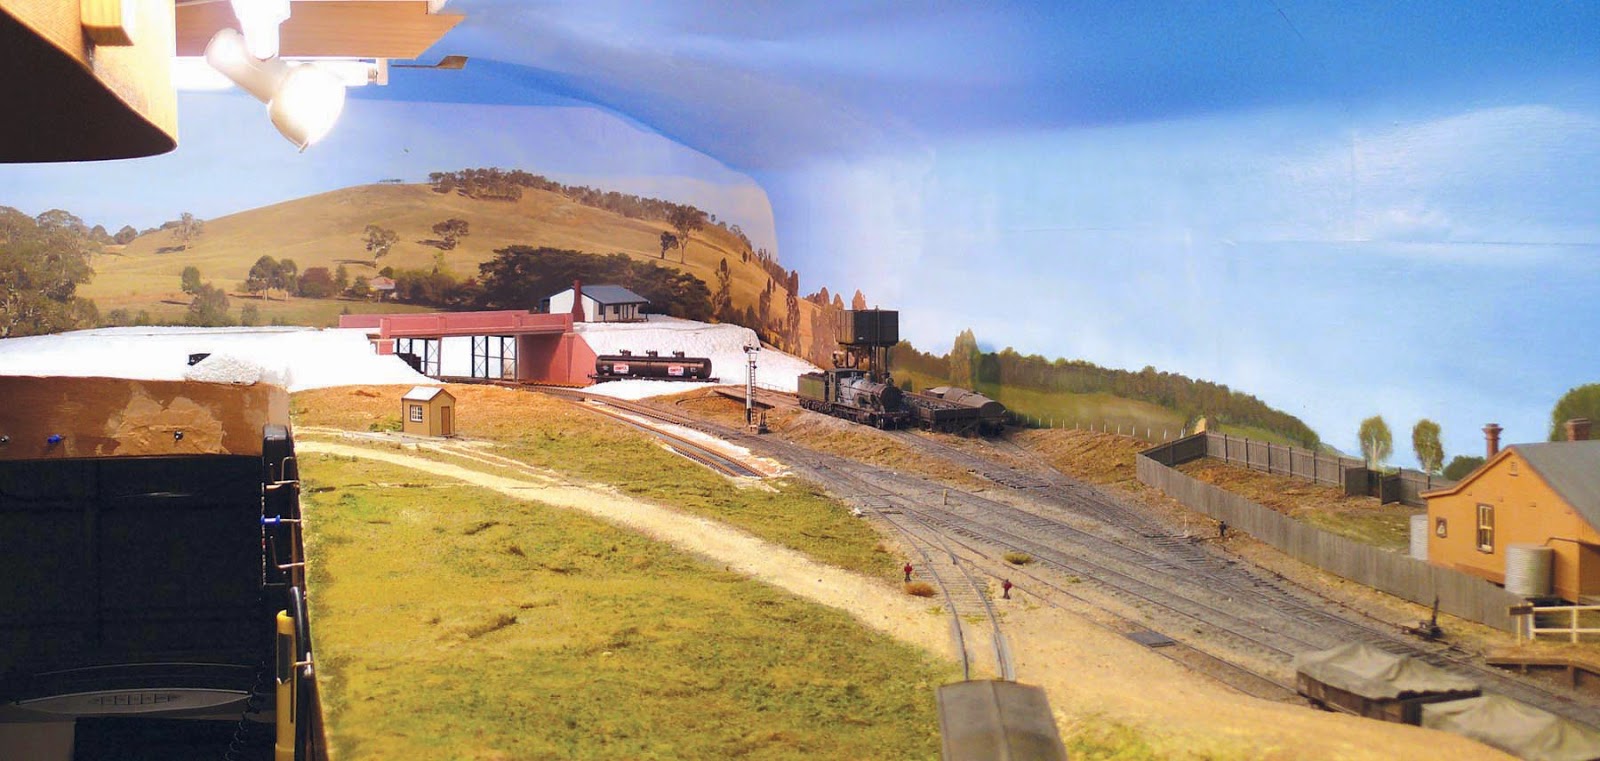
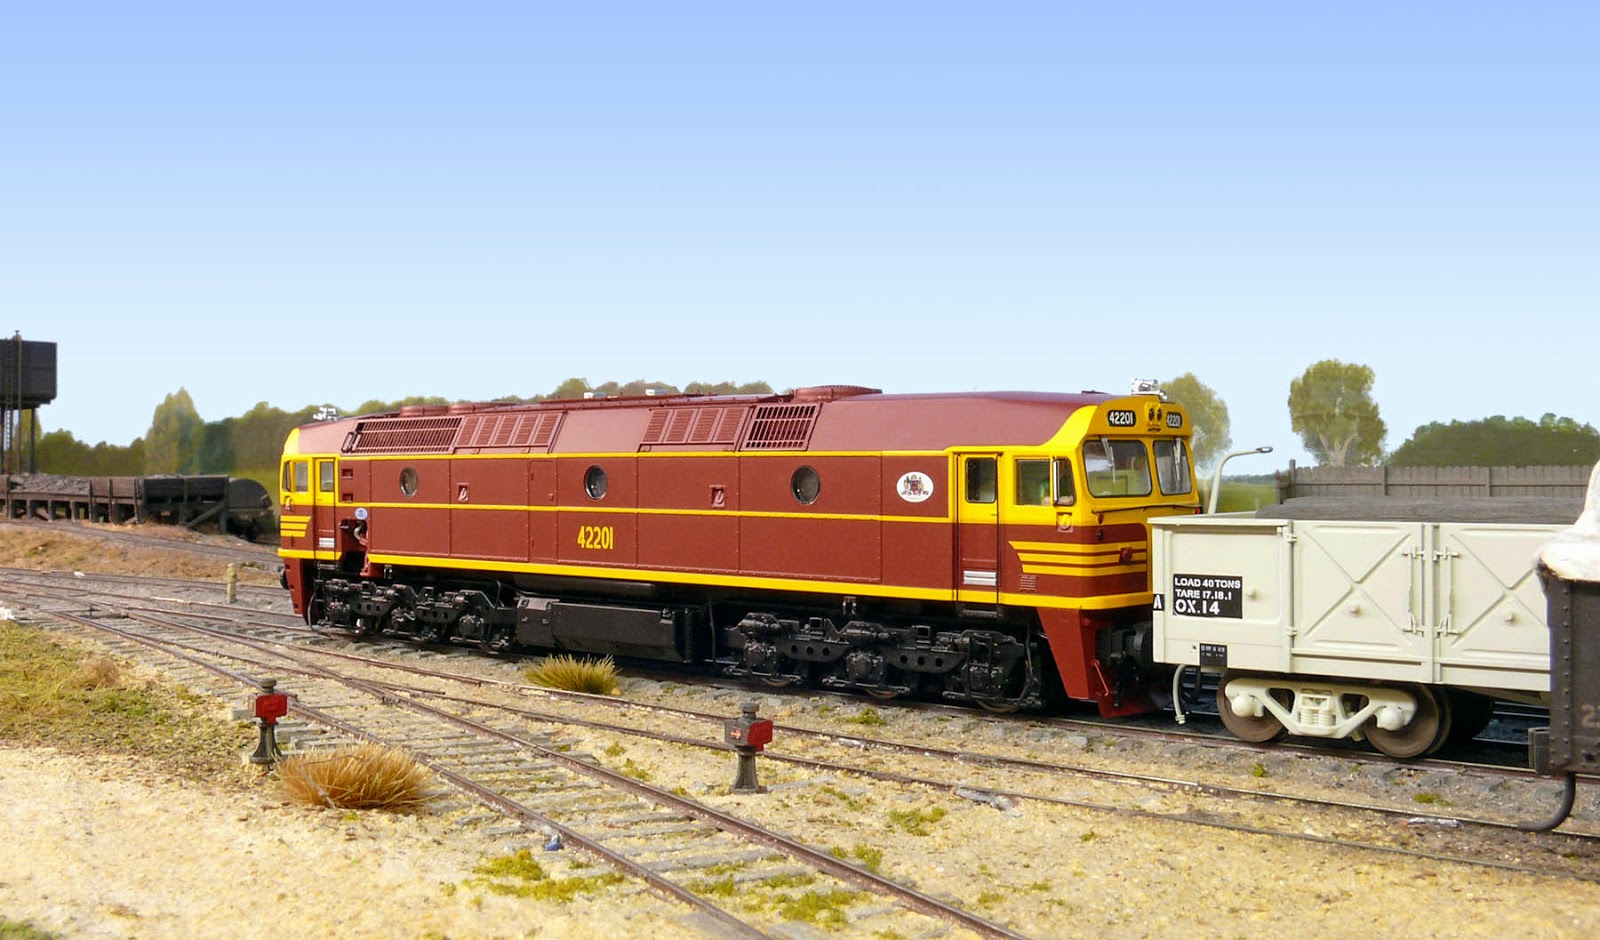
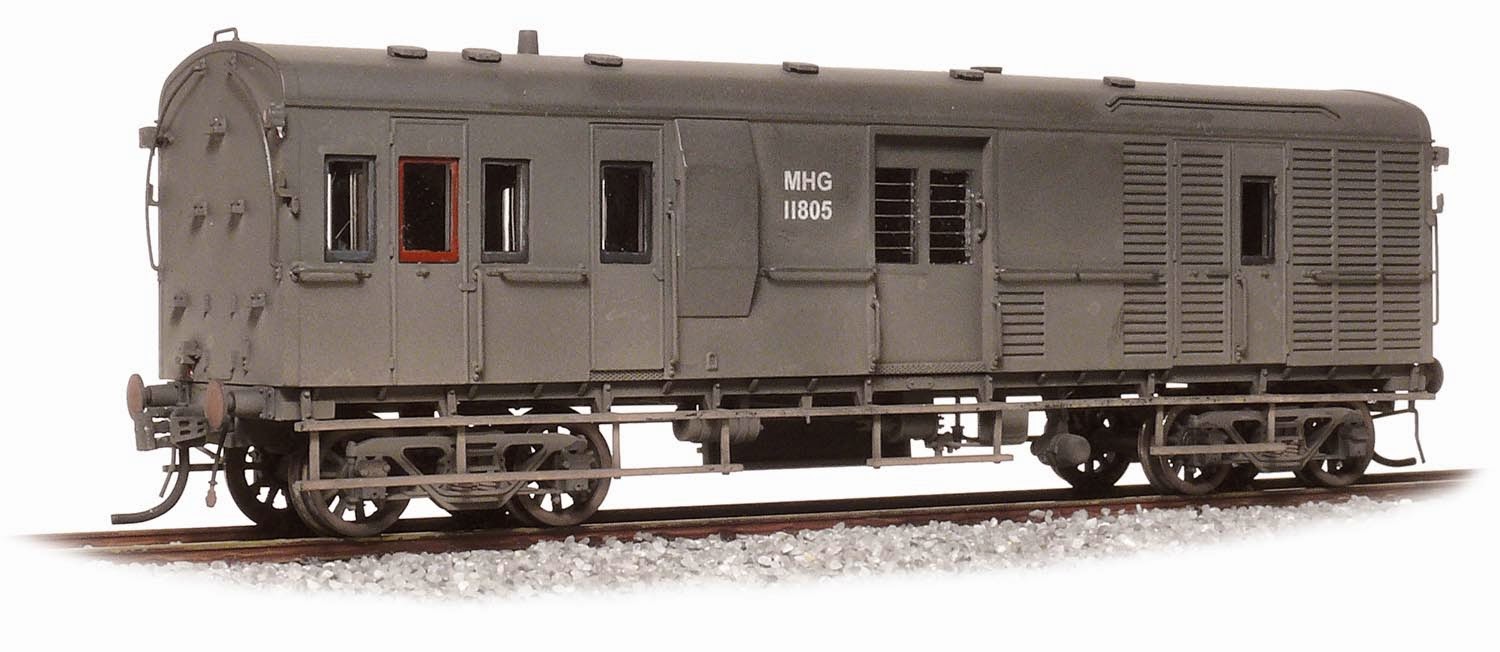
By 21 December, the wiring had advanced sufficiently so that the new section (except for the repair siding, which was spiked over 'out of use' until some more point motors could be obtained) was operational. Here we see the Official Train, comprising varnished TAM and Tuscan and russet AM sleeping cars, headed by dirty green 3240 and trailed by a Tuscan and russet MHO, as befitting the late WW2 period of construction, brings some 'brass' from the 'big smoke' to inspect the new works. As you can see, 'Construction Branch' is still well and truly in possession!

Shortly after the shot above, the very first goods train to use the new facilities enters the New Yard. Hauled by 5262, this mixed goods had arrived from Cowra. Yard shunter, 5303 (which really should be facing towards the yard) waits to deal with the train.


Yard pilot, 5303, has shunted the incoming train to one of the storage sidings and now stands in the departure road with the brakevan off the train. In the background, 3240 has turned and is getting read to haul the Official Train back towards Sydney. No doubt, there will be other inspections made on the way and the Traffic Inspector's note book will be kept very busy!

Once everything was operational, that was pretty much it for a year! I ran trains, thoroughly testing the trackwork and making adjustments to the operating patterns, but not much else. However, the urge to do some more hit a week or so ago, so there may be some more updates soon!